Blog
How to put a man door in a shipping container
How to put a man door in a shipping container
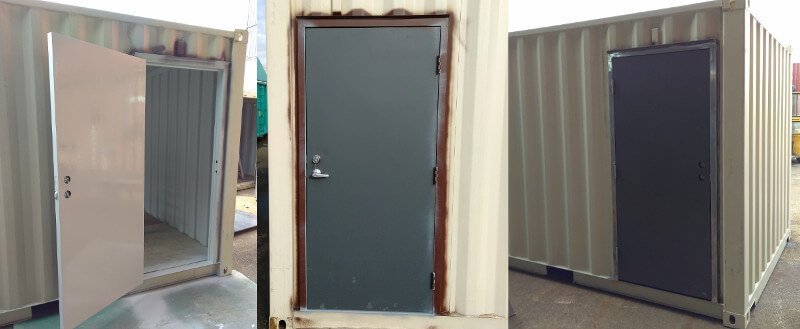
How to put a man door in a shipping container. To put a man door in a shipping container, you’ll build a steel or wood frame (often rectangular hollow section/RHS or angle iron) to create a square opening, cut the container wall, weld or bolt the frame in place, install your pre-hung door, and then seal gaps with foam and silicone, ensuring a weather-tight, level, and square installation for easy opening.
Key Steps:
- Plan & Mark:
- Choose your door location, keeping in mind corrugations for a flat surface.
- Place your frame material (e.g., RHS) against the container wall where the door goes and trace its outline, leaving a small gap (2mm) for the frame.
- Drill pilot holes from the outside to mark the interior for cutting.
- Build & Attach Frame:
- Cut the marked opening with an angle grinder, supporting the metal as it falls.
- Tack weld or bolt support plates to the container wall.
- Position the frame, check for level and square, then fully weld (stitch welds are common) or rivet it in place.
- Install the Door:
- Center the door in the frame and use packers (shims) to maintain an even gap all around.
- Test the door’s swing to ensure it’s free and doesn’t catch; adjust the frame if needed.
- Drill and rivet the frame to the container, focusing on the corners first.
- Seal & Finish:
- Install a rain deflector (drip cap) above the door.
- Fill gaps between the frame and container with spray foam or silicone sealant for weatherproofing.
- Paint over any bare metal with rust-inhibiting paint.
Tips:
- Materials: Use steel RHS (Rectangular Hollow Section) or angle iron for framing.
- Tools: Angle grinder (230mm cut-off wheel for speed), welder, spirit level, tape measure, drill.
- Safety: Wear gloves, eye protection, and a respirator.
- Sealant: Silicone is crucial for preventing leaks